Throughput tests can be run as scheduled jobs, without initiating them manually. The Schedule page provides an interface for creating such automatic tasks.
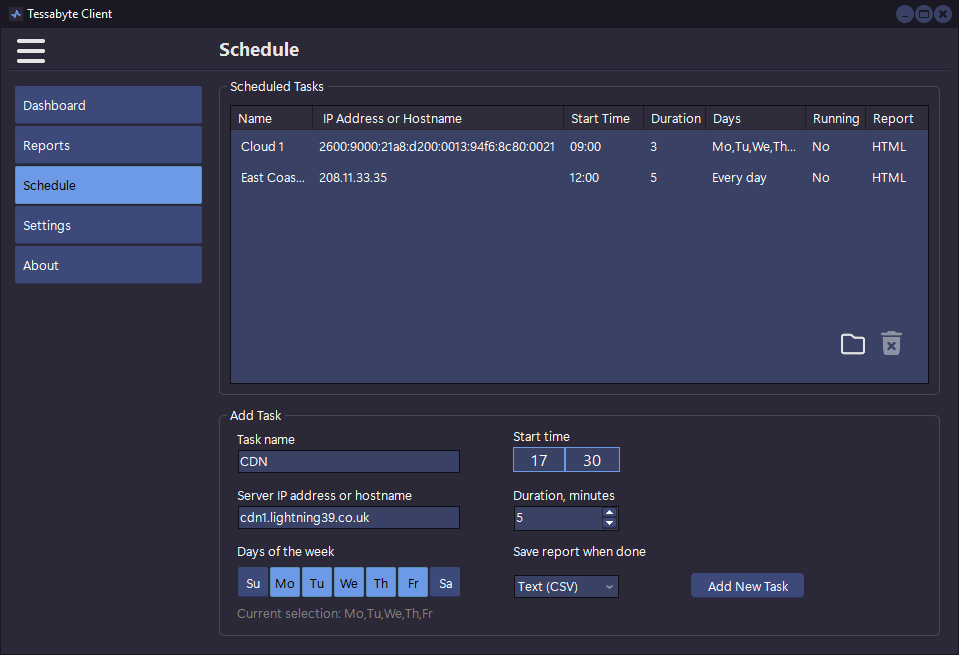
To create a new task, enter a unique task name, the IP address or hostname of the server, select the days of the week by toggling the corresponding buttons, and choose the start time and test duration. Upon test completion, the application can generate and save an HTML or CSV report, so choose the preferred format and click Add New Task. The new task will be added to the task list in the upper part of the page. The Running column indicates the current status and changes from No to Yes when a task is running.
If a task is scheduled to run while the application is busy conducting a manually initiated test, the manual test will be interrupted in favor of the scheduled task. To delete a task, select it from the list and click the trashcan button. To open the folder where reports are saved, click the folder button. Reports are named using the task name and end time, for example, "CDN 26-Dec-2024 15-59-58.htm". Additionally, if you hover the mouse over a recently completed task, a tooltip window will prompt you to double-click the task to open the latest report.
A few other important things to remember when working with scheduled tasks:
Some report settings are customizable; refer to the Customizing Settings chapter for more information.