To perform a throughput test, the application uses two components: a server and a client. The server component of the application listens for connections from clients, while the client connects to the server. Once a connection is established, the client and server exchange data in both directions, and the client component computes and displays the network metrics. The server component can accept connections from multiple clients.
When you install the application, both the server and client components are installed. You can then run either one, depending on how you plan to perform the tests. In a WLAN setup, the server component should run on the wired side of the network, while the client component should run on a WLAN client. In this type of setup, "downstream" refers to the data flow from the wired side of the network, through the access point, to the client, while "upstream" refers to the data flow from the client, through the access point, to the wired side. For wired LANs, it doesn't matter which of the two computers acts as the server and which as the client.
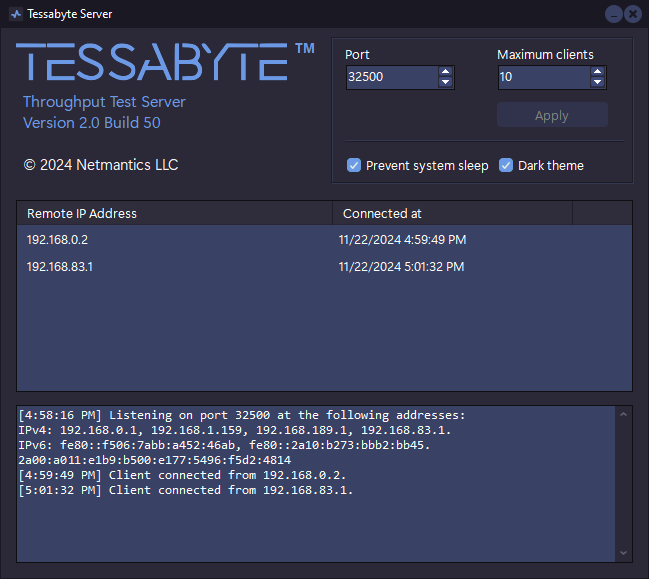
The server component of the application (illustrated below) has two key configurable options: the port on which it listens for incoming connections and the maximum number of concurrent client connections. By default, the server listens on port 32500.
If you want to change the default parameters, make sure to click the Apply button after modifying them.
You can also check the Prevent system sleep box to prevent the computer from going into sleep or hibernate mode while the application is running. Use the Dark theme box to switch between the dark and light user interface themes (Windows only; on macOS, the application uses the currently active visual style).
The middle panel lists the IP addresses and connection times of the currently connected clients. The lower panel displays the IP addresses that the application is listening on for inbound connections (it listens on both IPv4 and IPv6 addresses). The same panel displays a log of client connections and disconnections as they occur.
The server component is available both as a standard application with a user interface, as shown above, and as a non-interactive Windows system service. This chapter is intended for advanced users who are familiar with the concept of system services. If you are not, you can simply run the standard Tessabyte server application whenever you need to conduct a test.
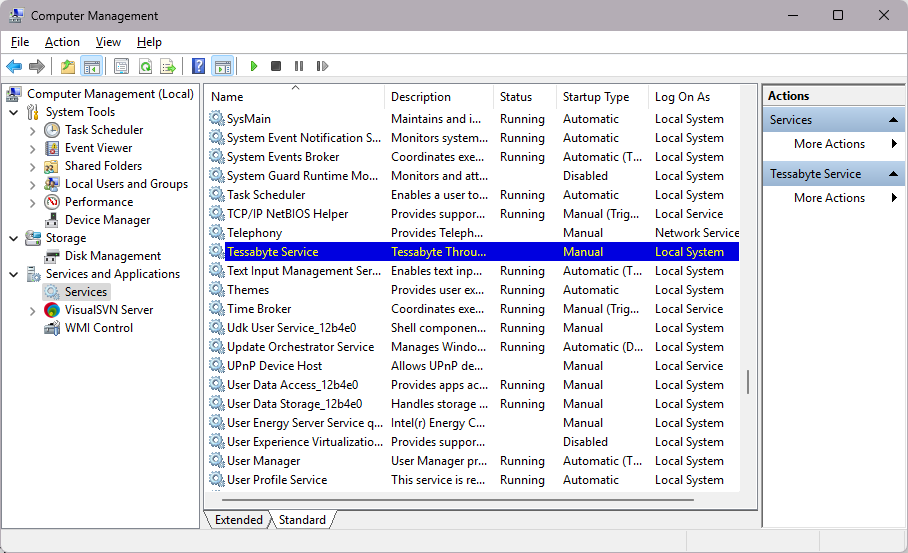
That said, if you prefer to run the Tessabyte server in a non-interactive, unattended mode under the system account and start it immediately after the system boots up, you can easily do so. During installation, Tessabyte creates a new system service named Tessabyte Service. The service is installed with the Manual startup type, meaning it won’t start automatically unless you configure it to do so. Like all other Windows services, Tessabyte Service is accessible in the Services section of the Computer Management panel in Windows, as illustrated below.
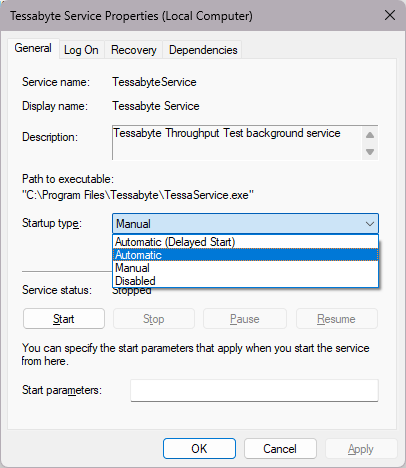
You can double-click the service to change the startup type to Automatic if you want it to launch automatically after the system boots. Then, click Start to start the service immediately:
A few additional tips for using this system service:
The Linux version includes only the server component. The server can run as a standard system daemon or as a console utility. The following command-line arguments are supported:
Example:
./TessabyteServer -c -p 41200 -m 20
When running in console mode, Tessabyte prints logs to the terminal window:
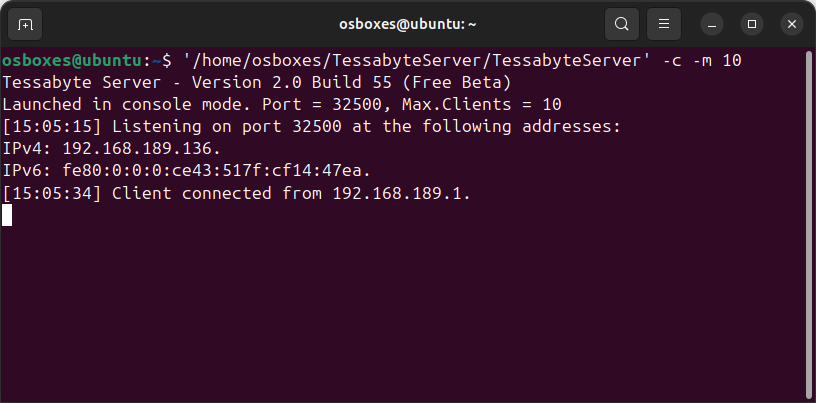
Without the "-c" argument, Tessabyte runs silently as a daemon. If you want it to continue running after the user logs out, consider the following two options.
Option A: Disable systemd's killing behavior
By default, systemd terminates all processes launched as part of a user session when the user logs out—even if they were properly detached from the terminal. To change this behavior, execute the following command:
loginctl enable-linger $USER
If you want to undo this setting later:
loginctl disable-linger $USER
Option B: System-wide systemd service running as root
Step 1: Create and edit the service file:sudo nano /etc/systemd/system/tessadaemon.service
Step 2: Add the following content to the service file:
[Unit]
Description=TessaDaemon system-wide service
After=network.target
[Service]
ExecStart=/path/to/TessabyteServer
Restart=always
RestartSec=5
Type=forking
StandardOutput=journal
StandardError=journal
[Install]
WantedBy=multi-user.target
Step 3: Reload systemd, enable, and start the daemon:
sudo systemctl daemon-reload
sudo systemctl enable tessadaemon
sudo systemctl start tessadaemon
On Windows, the application installer automatically creates a Windows Firewall rule that allows it to accept connections. If you use a third-party firewall or a firewall on macOS or Linux, ensure it is configured to allow incoming connections for this application. Both TCP and UDP connections must be allowed. Since the application uses random ports for streaming data back to the client, the best strategy is generally to configure the firewall to allow all connections to and from the server, regardless of the port and protocol.
While Tessabyte Throughput Test is primarily designed for testing LAN and WLAN throughput between local nodes, it can be used for testing WAN throughput. However, you should bear in mind that you may encounter issues with NAT. Generally, a computer located behind a NAT cannot receive incoming TCP connections and/or UDP streams on an arbitrary, unsolicited port without some additional configuration or protocol assistance. This means that the server must be installed on a computer with a public IP address and that if the clients are behind a NAT, they may be limited to TCP tests only. A preferable solution is using IPv6, as it generally doesn't require NAT.
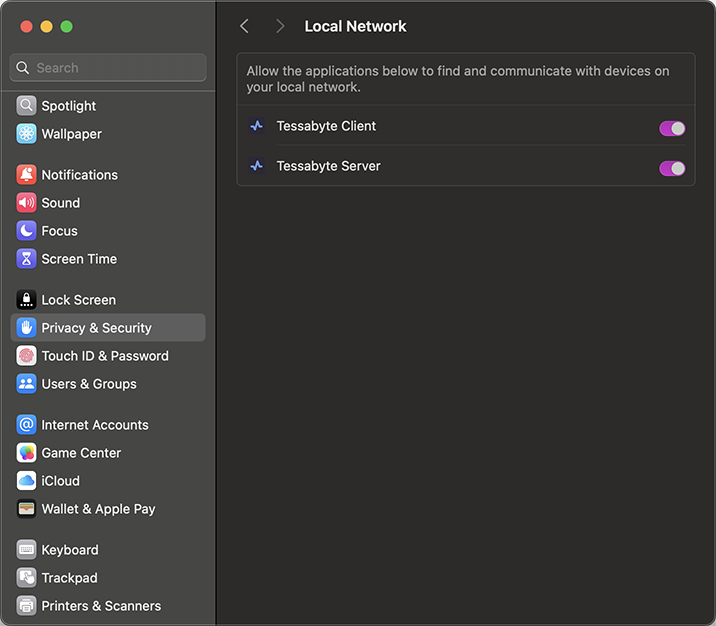
When you install the application and use it for the first time on macOS Sequoia, the operating system will ask you for a confirmation that looks like this for the client and the server, respectively:
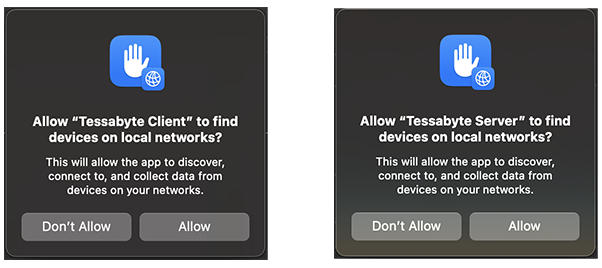
These dialogs typically appear after you click "Connect" in the client application for the first time and/or when the server application accepts a client connection for the first time. You must grant this permission to both the client and server applications; otherwise, they will not function properly. You may need to re-launch the applications after granting permission. To verify that the permissions were granted, open macOS Settings → Privacy & Security → Local Network, as shown below.